Symmetry Name Creature Drawings
Video: Intro into Symmetry
Video: How To Make a Name Creature Drawing
|
| ||||
Yesired
|
Bailey
|
Mark
|

Noah
|
BIG IDEA: Students will create original artwork and manipulate images to demonstrate understanding of line symmetry.
KEY KNOWLEDGE:
REQUIREMENTS: Watch the Intro into Symmetry video and answer 4 of the 8 questions below:
ACTIVITY #2 Creating a symmetrical Name Design
REQUIREMENTS:
INSTRUCTIONS: Watch the video below and create your very own symmetrical name design
Getting started....
KEY KNOWLEDGE:
- Practice symmetry and discover new experimental techniques
- Learn art and math vocabulary and their meanings
REQUIREMENTS: Watch the Intro into Symmetry video and answer 4 of the 8 questions below:
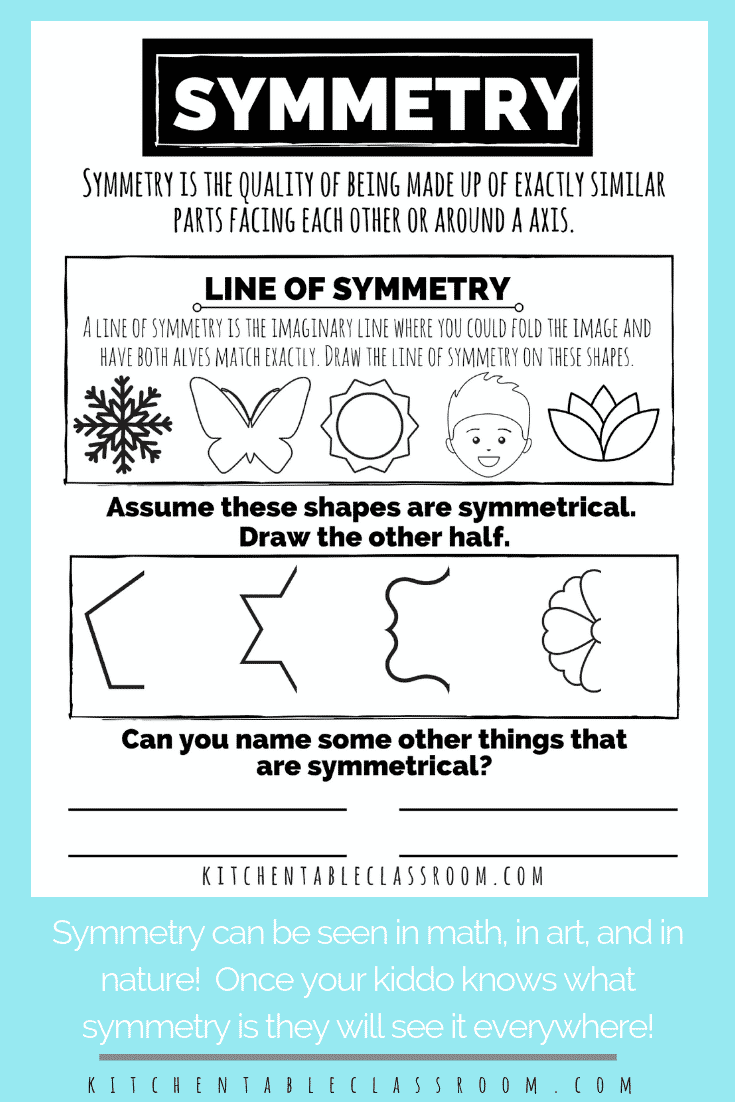
- What is symmetry?
- In what subjects do you discuss symmetry?
- An object that his symmetry can be divided into what?
- When an object has symmetry we call it....
- When an object does not have symmetry we call it....
- How can you describe reflectional symmetry?
- How many lines of symmetry does a square have?
- Where do we often find symmetry? Give examples.
- Find an object in your home that is symmetrical, what is it? Can you name other objects?
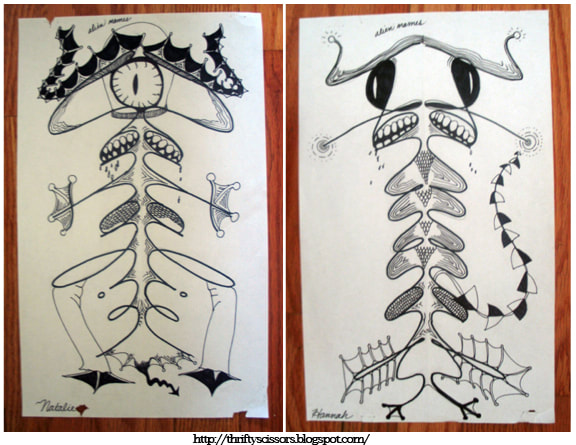
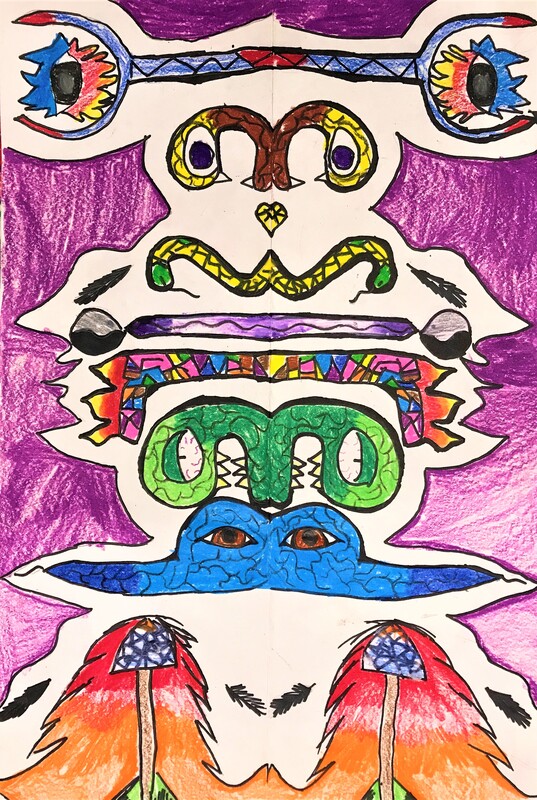
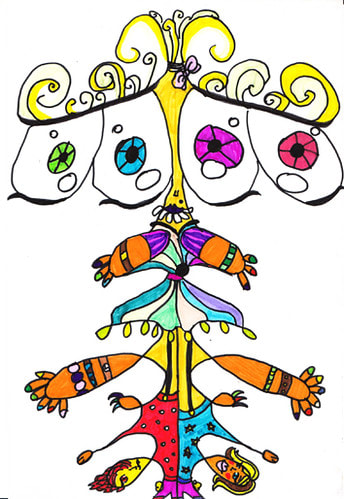
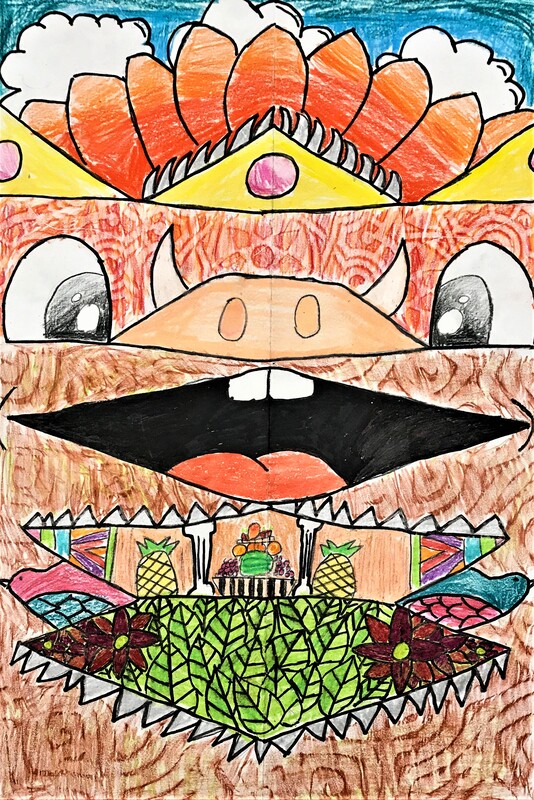
ACTIVITY #2 Creating a symmetrical Name Design
REQUIREMENTS:
- Create one name design that is disguised/camouflaged using patterns, objects, symbols.
- demonstrate symmetry
- demonstrate good craftsmanship
INSTRUCTIONS: Watch the video below and create your very own symmetrical name design
Getting started....
- Start with a piece of white paper folded in half the long way: Horizontal or “hot dog bun way.”
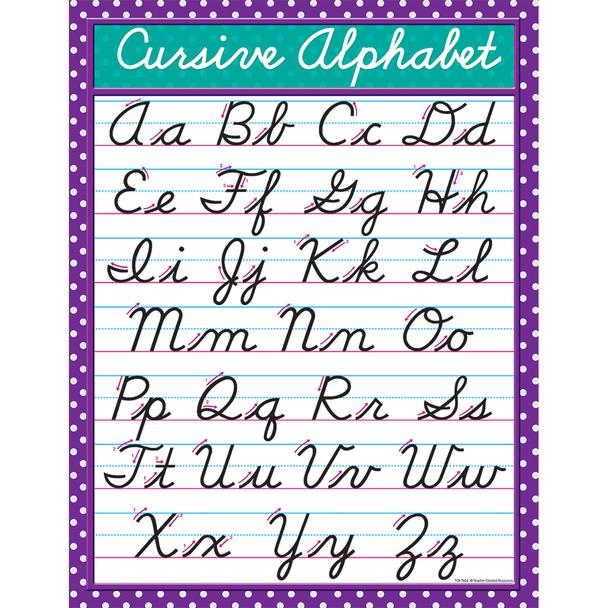
- On one side of the fold write your name with the bottom sitting on the fold. This can be done in cursive OR in print letters and try to make your letters as close as possible.
- Write big. This is vital to the success of the project. Write big.
- Any “hangers” that go below the fold can just be erased and ignored. (Think G’s, J’s, & Y’s.) Don't let this drive you crazy. By the time you are done you will barely recognize your name name. It’s okay if it does not look perfect!
- Once you have a name written nice and large it’s time to transfer the image to the opposite side of paper to get that symmetrical image. This is easy and requires no special transfer paper. Make sure the pencil line of your drawing is nice and thick. Close the paper and use the closed lid of a Sharpie, marker or dark drawing tool to rub over the pencil line. You will be rubbing on the back of the side of the paper that has no image. You should be able to see through that one layer of paper to see where your lines are. That little bit of pressure will transfer enough pencil lead to the blank side of the paper that your image can be seen.
- You can also transfer the image by using your window as a light source and trace onto the opposite side.
- Once the name image is transferred you have this weird, awesome symmetrical shape. Set your imagination loose as you add parts, patterns, and pieces to your design to turn it into a imaginary creature.
- Use the same method as above. Draw only on one side and transfer the image to the opposite side.
- Once the creature is happy it’s time to add some color. This can be done with markers, colored pencil or crayons. Use what you have
- Outline that crazy creature with a darker outline. This will help even up the pencil lines that are extra thick on one side and barely visible on the other.
|
|
|