Winter Wonderland Woodland Creatures -
PAPER MACHE From the Kitchen
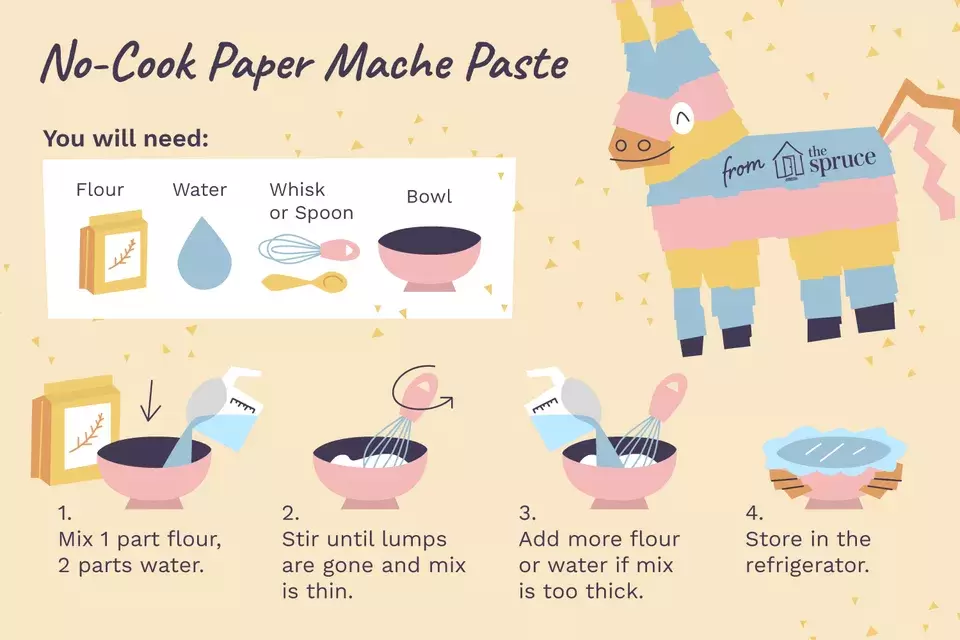
Video and image instructions: A No Cook Paper mache Recipe
Five Step by step paper mache recipes
How to make Tissue Paper Clay/Paper mache
| winter_wonderland_paper_mache.pdf |
| 5th_grade_visual_art_rubric.pdf |

BIG IDEA: Creating woodland creatures (head or full body) in the style of London based artist Abigail Brown and inspired by the lesson of German based artist Honigkukuk (Katja Ensling)
ESSENTIAL QUESTIONS:
Conceiving and developing new artistic ideas and work, refine and complete artistic work:
DAY 1. Review, rough draft sketches and armature build.
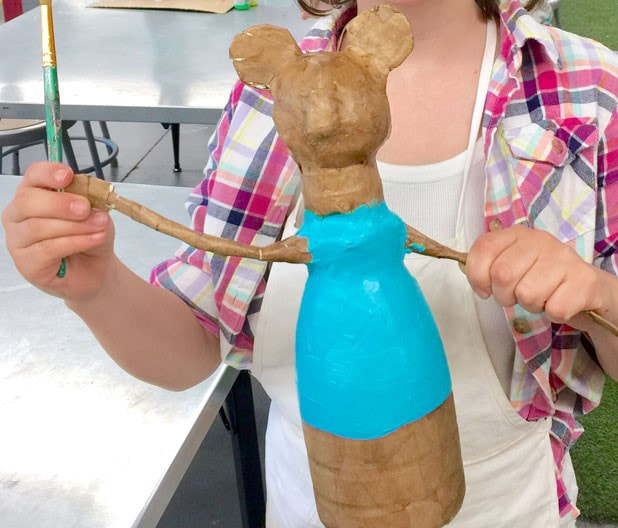
DAY 2. Paper mache build and added structural details.
DAY 3. Paint and add fine details.
What should you do if you finish early?
- Create another draft of a woodland animal and practice drawing skills.
INSTRUCTIONS:
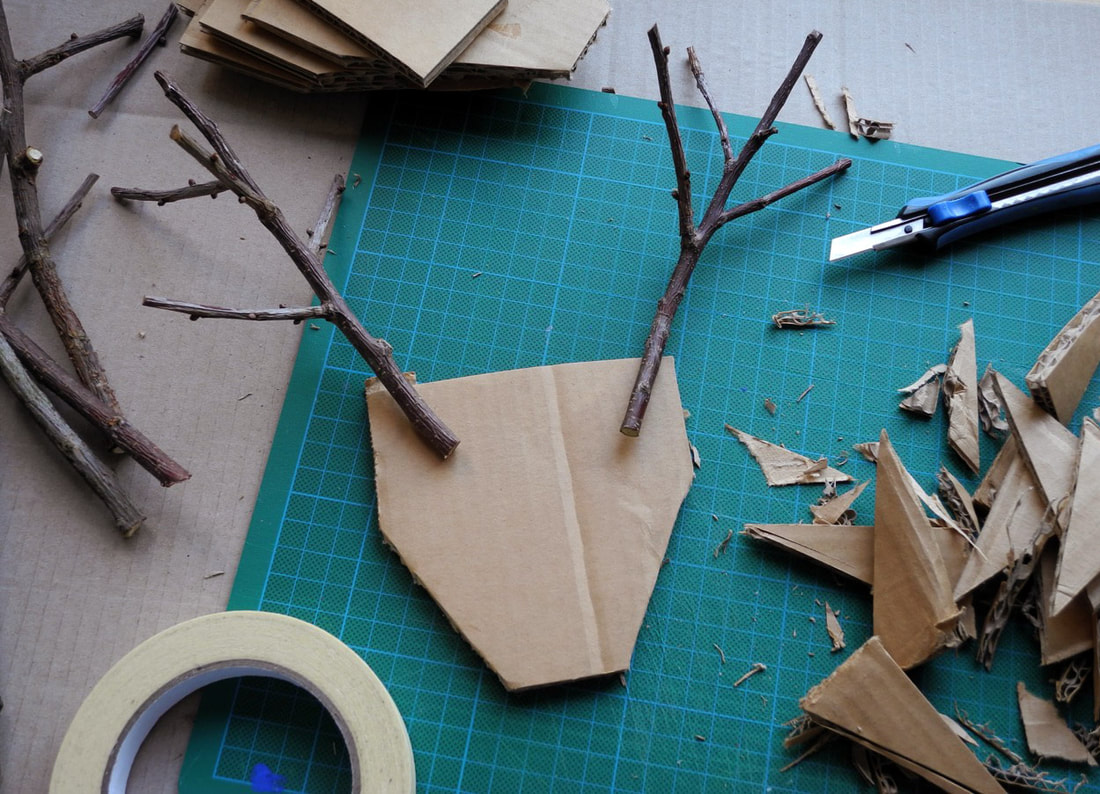
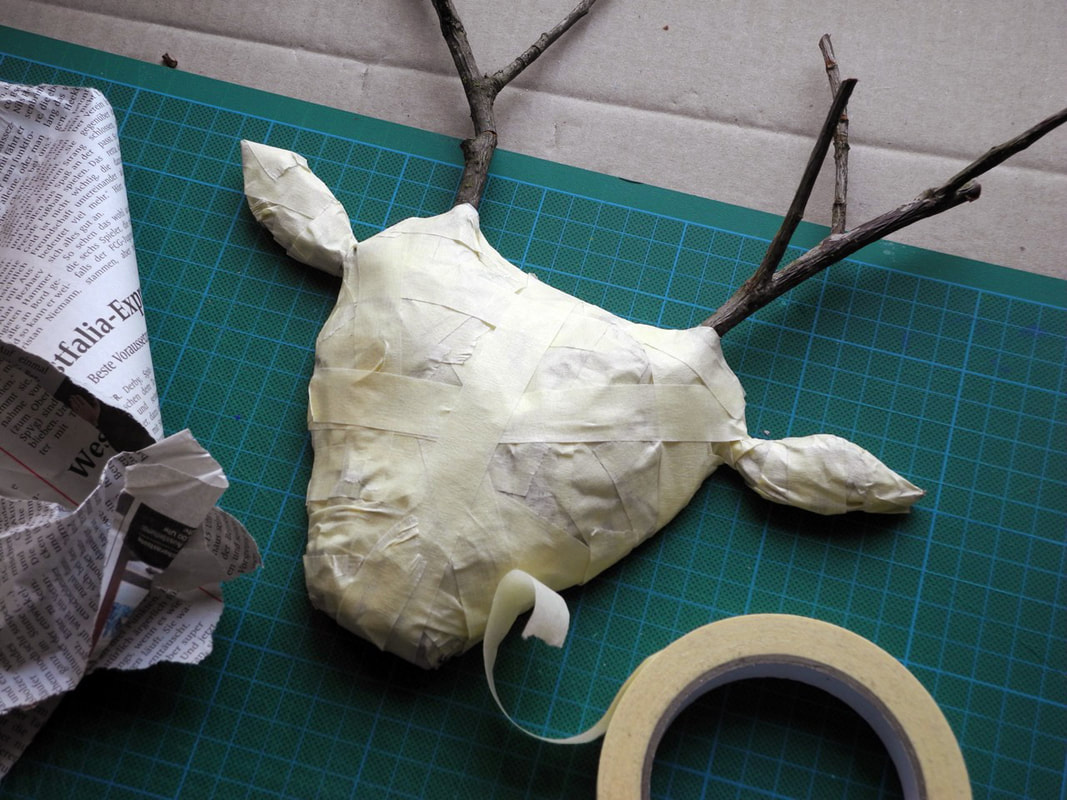
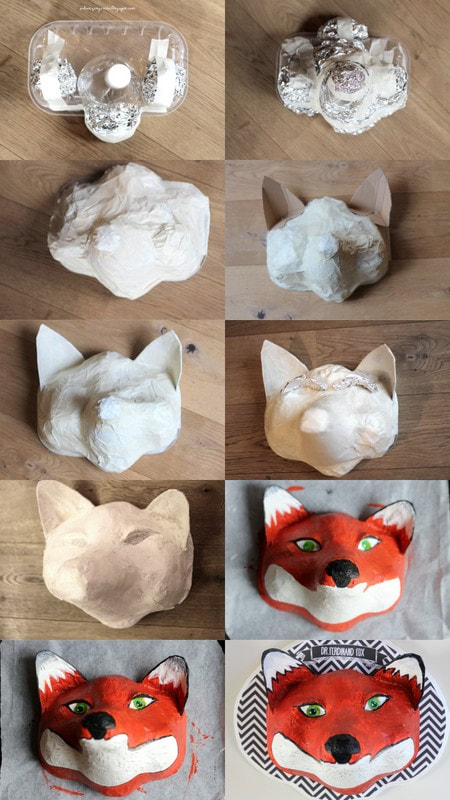
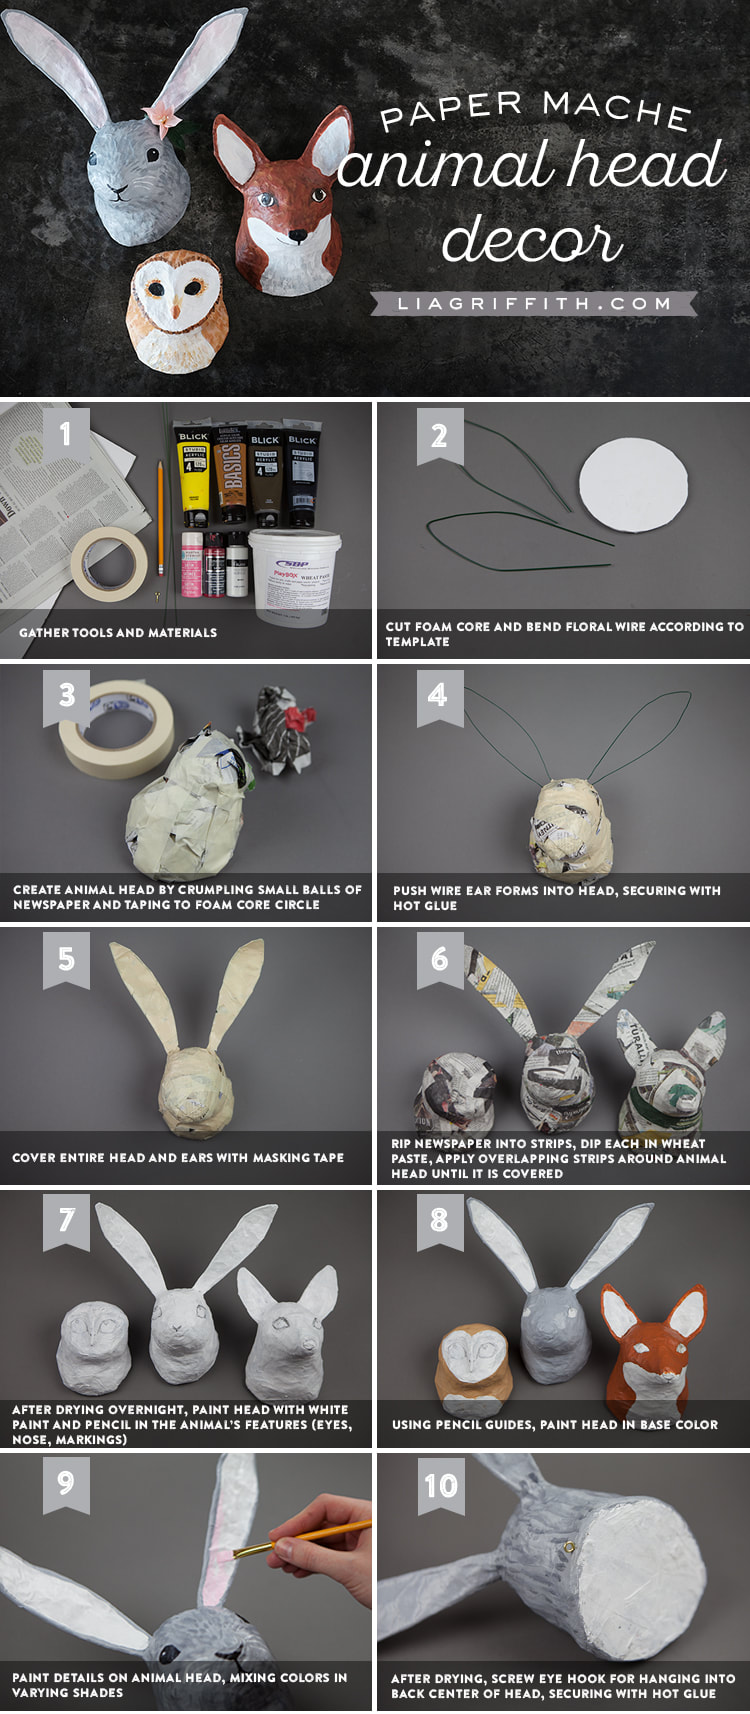
Step 1: Build your sculpture using items that could readily be found found at home: Tinfoil, Cardboard, Plastic bottles, containers, cups, lids. caps. tape, twigs...whatever you have.
Step 2: Make glue with flour and water in a mixing bowl - I like to add a tbs. of lemon juice or white distilled vinegar to help preserve it.
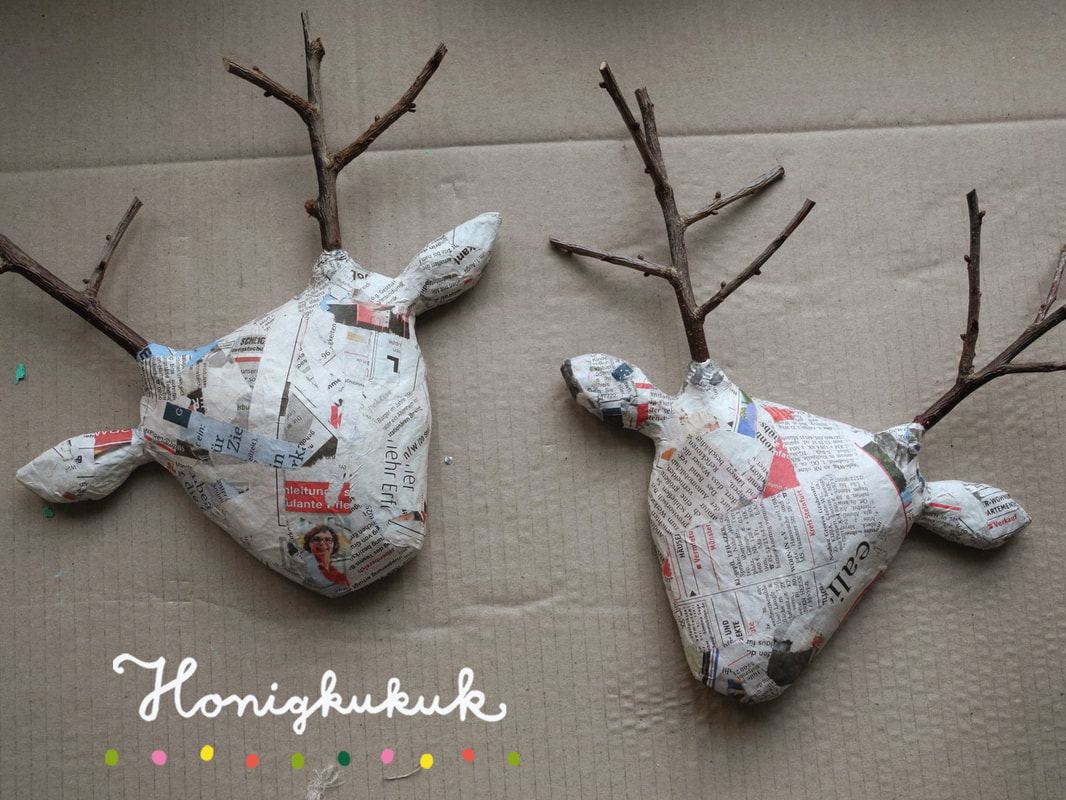
Step 3: Rip or cut up either paper towels, brown grocery bags, newspaper, magazines, etc to use for gluing
Step 4: Dip paper into paper mache glue and neatly add strips onto your sculpture. You can also build with the paper as well and add facial details
Step 5: Optional/Decorate and paint - Embellishments: fabric, beads, tissue paper.
ESSENTIAL QUESTIONS:
- How can you make artwork from repurposed and found materials?
- What other materials can you think of that could be be sourced to create art that are not considered art supplies?
- How would repurposing materials to create art impact mother earth and also society?
Conceiving and developing new artistic ideas and work, refine and complete artistic work:
- Discovering how to resource materials that can be found in your own home.
- Building technical skills in sculpture and creating an armature, making homemade paper mache glue.
- Vocabulary words: In sculpture, an armature is a framework around which the sculpture is built. Paper mache, or papier mâché (“chewed paper” in French), is a method of art that involves paper and a paste that the artist creates.
DAY 1. Review, rough draft sketches and armature build.
DAY 2. Paper mache build and added structural details.
DAY 3. Paint and add fine details.
What should you do if you finish early?
- Create another draft of a woodland animal and practice drawing skills.
INSTRUCTIONS:
Step 1: Build your sculpture using items that could readily be found found at home: Tinfoil, Cardboard, Plastic bottles, containers, cups, lids. caps. tape, twigs...whatever you have.
Step 2: Make glue with flour and water in a mixing bowl - I like to add a tbs. of lemon juice or white distilled vinegar to help preserve it.
Step 3: Rip or cut up either paper towels, brown grocery bags, newspaper, magazines, etc to use for gluing
Step 4: Dip paper into paper mache glue and neatly add strips onto your sculpture. You can also build with the paper as well and add facial details
Step 5: Optional/Decorate and paint - Embellishments: fabric, beads, tissue paper.
- Flour can be substituted with white glue
|
|
|
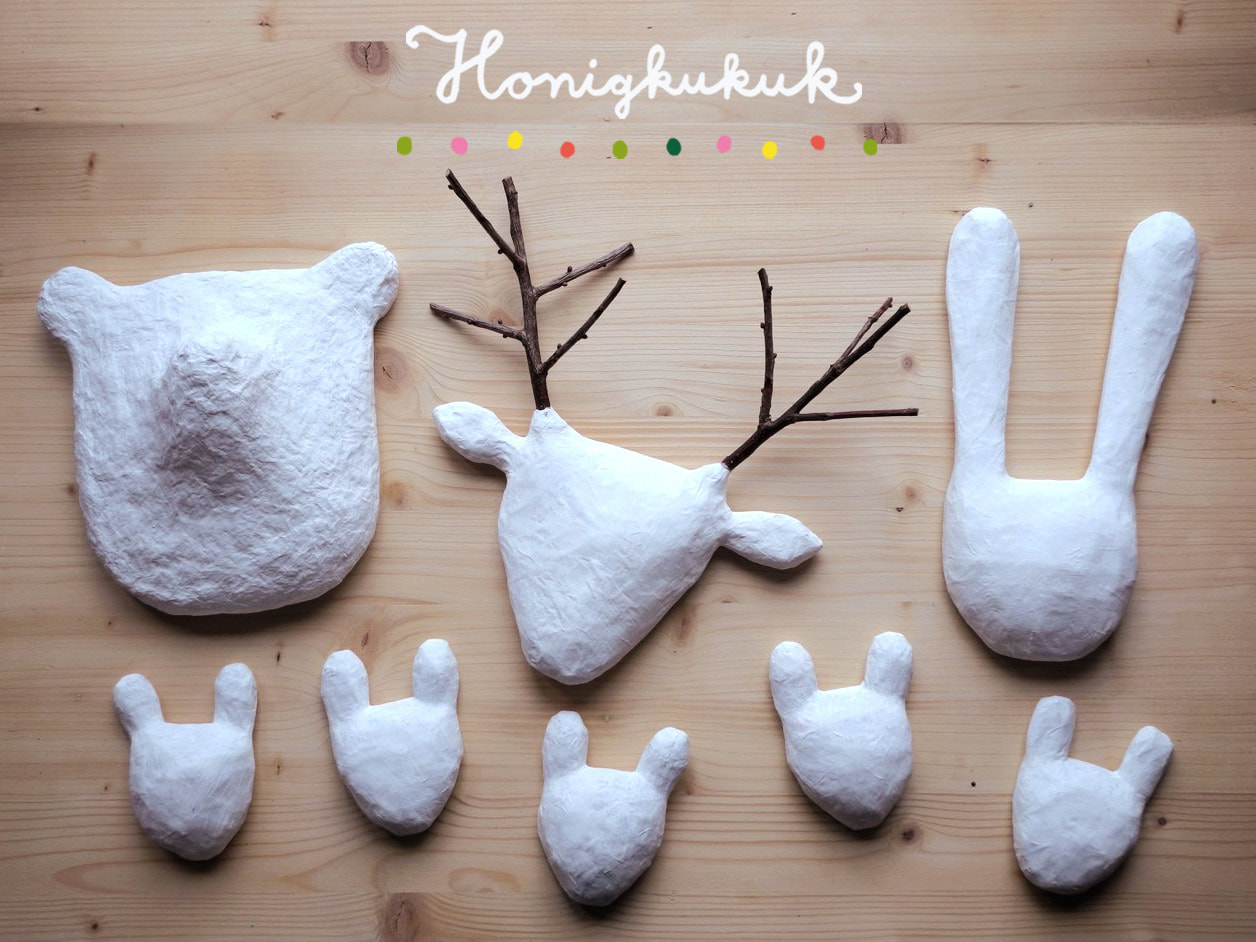
The art of Honigkukkuk
|
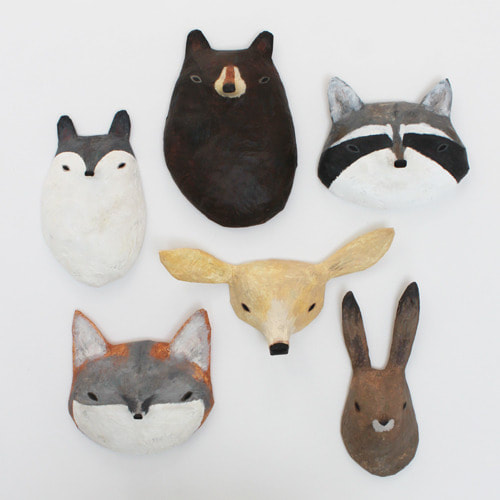
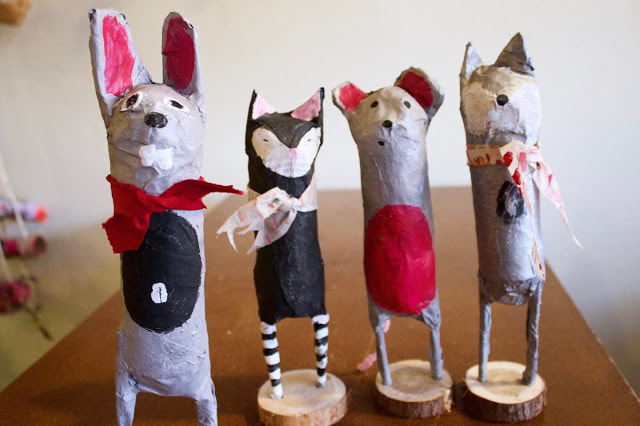
The art of Abigail Brown
|
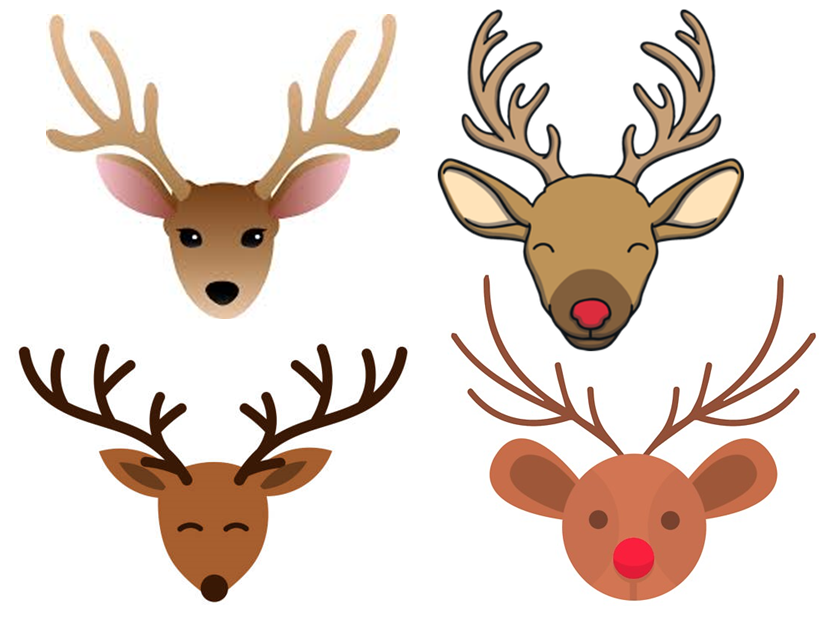
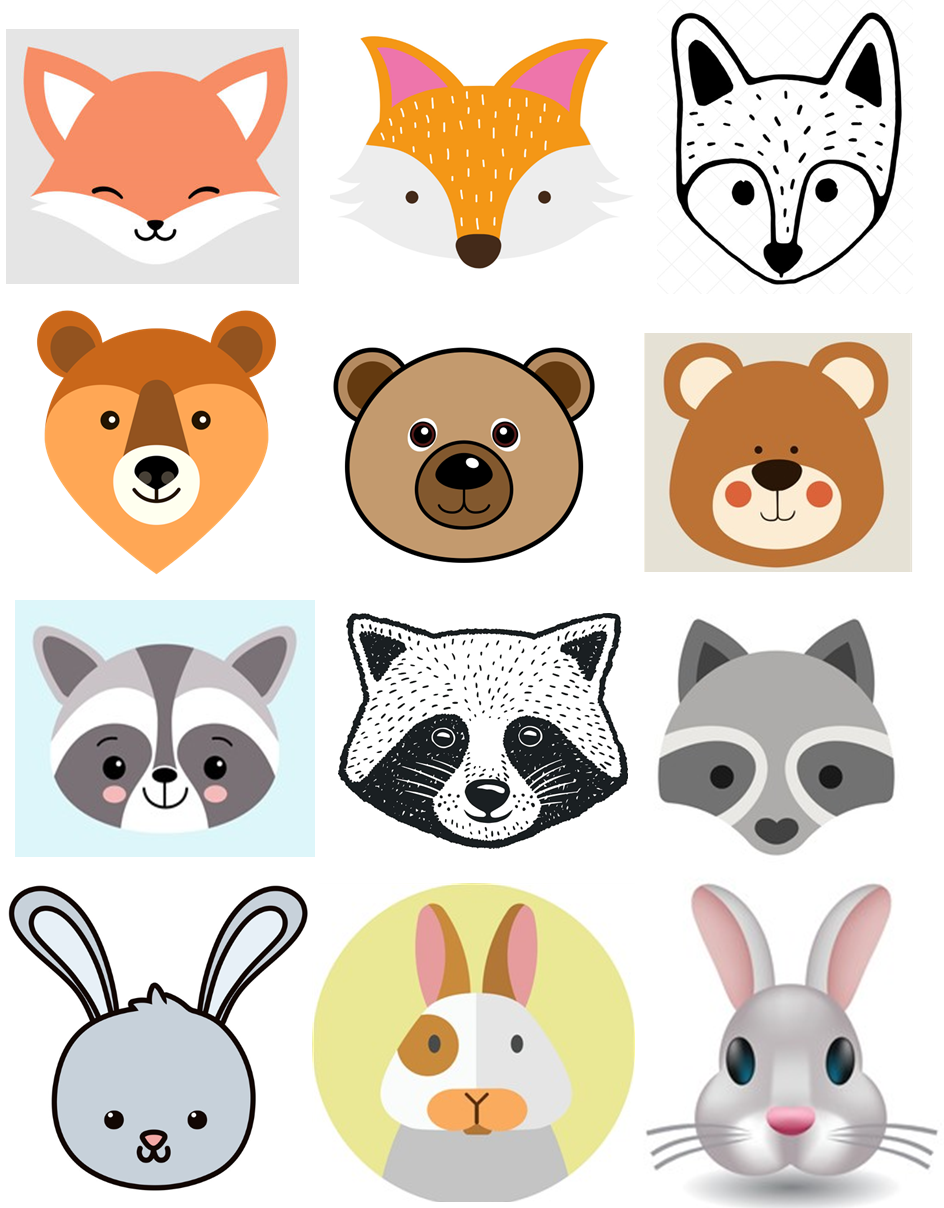
Below: Reindeer head shapes and other woodland creatures, fox, bear, raccoon, rabbit
|
|
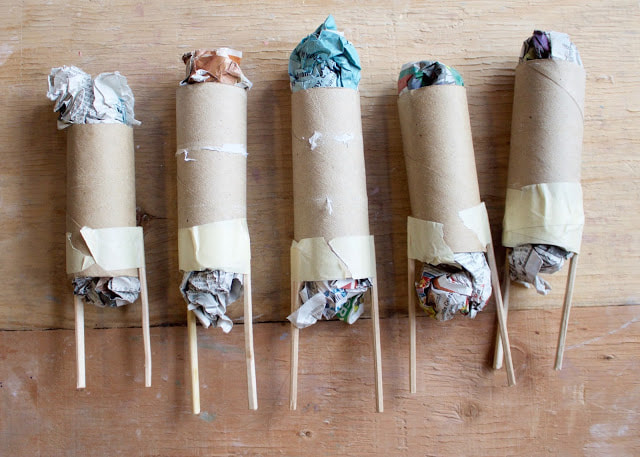
Below: Building with toilet paper rolls, bottles, tape and paper - twigs could be used instead of wooden dowels.
|
|
|
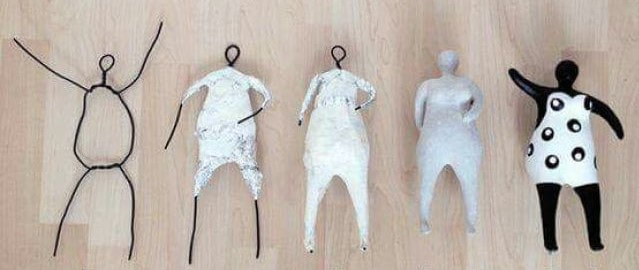
Below: More references / instructions to help guide you with different material builds...
|
|
